The Shape of Things

This is my before picture. Once a week I will post a progress picture until I get to an after picture.
Since I’ve been at it for a few weeks now, I thought I’d share my progress on getting back in shape. Getting back in shape after having two babies over the course of 3 years is hard work. In fact, I was only really starting to get back in shape from the Bear when I found out I was pregnant with the Cub. So while I was taking a few steps forward, I took one giant one back. Isn’t that always the way of things? BTW, the photos in this post were taken at the beginning (top), three weeks in (middle), and then another 2-3 weeks (bottom)
Weekly #gymselfie fitting comfortably in smaller size jeans, posture is better, butt is sitting higher
Anyway, getting back into shape can mean very different things to different people. For me, it means I want to build muscle, lose fat, get rid of the deflated balloon that has taken over my midsection, and fit into my old clothes (and finally buy some new ones). Getting back into shape is not me having a fight with the scale or starving myself or trying crazy diets. When I’m hungry, I eat, even if it’s at 9 PM. If I’m thirsty, I drink water. I don’t skip meals or food groups, but over the course of the last few years I have definitely changed my eating habits by eating less packaged and processed food by making most things at home and eating more vegetables. Still, I love butter and sugar, and turning them into cakes and cookies, just not all the time. I’m not trying to get a thigh gap. Frankly, I think I would feel really weird if my thighs didn’t touch, my body wasn’t built that way and I’m glad. Getting back into shape means that I go to the gym most days, and when I can’t go I work out at home and do my best to spend a good portion of the day on my feet and moving around.
For me, this is about being healthy. It’s not about hating my body and beating it into submission, which I think is how a lot of women feel when they think about weight loss. Oh but wait, I haven’t said anything about weight loss, I’ve said I want to build muscle and lose fat, and that I think is key. I am not concerned with the number on the scale as much as I am with the number on the tape measure when I put it around my waist every couple weeks. In this game of numbers, the scale is usually your worst enemy. In fact, in the 5 or 6 weeks that I’ve been exercising regularly, I’ve only lost a few pounds, but I’ve taken two inches off my waist, which is significant and far more motivating than saying I lost ten pounds, but still being super jiggly. If you look at the photos you can see that my midsection has come in and will continue to come in not because I’m running a marathon every day, but because I am approaching the deflated balloon with a two pronged attack: 1) carving out the muscles underneath while 2) whittling off the layers of fat on top.
In case you thought I'd quit. #motivationalgymselfie

What’s working:

Kettlebells! I love working with kettle bells because they challenge my whole body, improve my posture, and make me feel stronger each time I pick them up. I’ve been trying out this sequence for my upper body and am noticing improvement in just a few sessions. (Seriously, though, Nicole’s whole blog is awesome)

Pilates. Again, I like pilates because I can do them at home and they help me pull in my middle and stand up a little taller.

Cutting back on sugar. Between the end of my pregnancy and the holidays I acquired a big sugar addiction. This isn’t to say I was sitting around eating 5 or 6 cookies a day, but I definitely was helping myself to a little something sweet after lunch AND dinner. I decided for Lent I would give up dessert, and the first few days have been tough. I definitely feel that I need something sweet after meals, even though I totally don’t.

Paying attention to inches and not pounds or even calories. Like I said above, getting into shape is a total numbers game, so it’s important to focus on the right ones. I do weigh myself regularly, but it’s only part of the equation. Since muscle is more dense than fat, as I have built back muscle while losing fat the scale numbers haven’t budged much but the tape measure has. Also, as long as I’m making sure to eat well, I’m not sitting around calculating my day around every last calorie. This blog post does a great job of explaining how women have become calorie obsessed and why we really shouldn’t be.

What I want to start incorporating:

Running: I enjoy running, but I need to get a bit smaller before I can start back at it so as not to add undue stress to my knees.

The rowing machine: These are great for working the whole body, I just need to start making time for it when I go to the gym.

More strength training: Now that I feel myself getting stronger, the weight section of the gym is a lot less intimidating.

I know that this is a process, and it will take time. I know that there will be plateaus, and frustration, and times when I just can’t put in as much effort as I want to. But sharing my story here has been a big help. I can’t wait to share more of this journey with you. I’d also love to hear about your own fitness stories and what’s been working for you.

xo, S.
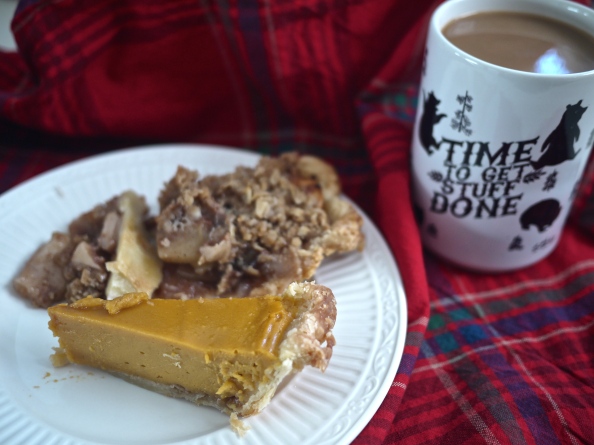
Happy National Eat Pie for Breakfast Day!

P1030477Ok, I don’t know if it’s a National Holiday, but it’s definitely my favorite post Thanksgiving tradition, so it should be national holiday. Forget getting up at the crack of dawn to fight people at the store. Today we’re relaxing after a day of eating too much and making a huge mess of our kitchen and house in general.

I’ve also just done a mini shop update over at my Etsy store. Several scarves are available and will ship in plenty of time for Christmas.

Hope you’re all enjoying a quiet day of pie, video games, and naps.

xo, S.

IMG_4728

Prep

P1030391In case you hadn’t noticed, we are deep in the midst of the let’s make ridiculously large meals and gorge ourselves for days time of year. Being a person who loves spending time in the kitchen, the holidays are right up my alley. I love figuring out the menu, researching recipes, gathering up ingredients, and then spending a few days prior to the main event in the kitchen putting everything together. But I have to tell you, I totally hit a breaking point last week when it seemed that every blessed food blog I came across had about 900 different tips, tricks, and even schedules to help the home cook prepare for Thanksgiving. It just seemed overwhelming, especially to folks who are not accustomed to hosting a large meal, or even a small dinner party. Information overload for sure.P1030395

I mean really, as long as the family is together and the pie makes it to the table…who really cares? Even if it’s a store-bought pie, or a bakery pie, or a pie with store bought crust (I do this ALL the time). I think all this “advice”, while well-meaning, misses the overall point of the gathering completely. It’s about being around the table with people you love (and who usually drive you a little crazy too) and enjoying a meal. It doesn’t have to be the wild affair with 10 appetizers, 20 side dishes, and  15 pies, with a table set with painstakingly handmade place cards and pinecone arrangements. Who has time for that? And if you’re stressing out over all that prep work, how do you have time to sit down with everyone and enjoy the meal? (note: I’m pretty sure we’ll eat our Thanksgiving meal sitting around the coffee table)P1030392

Being in the military. DB and I don’t get to spend a lot of holidays with family. In fact, we haven’t spent any holidays with either of our families since we got married. In fact, we’re pretty happy at this point just to have had the privilege of spending our holidays together in the same house and same country. Our lifestyle puts things into perspective for me in a way I never thought of previously, and I hope it’s something that I can instill in the Bear and our new little one throughout their childhoods. The important thing is not the turkey. In fact, one Thanksgiving a few years back the turkey didn’t even make it to the table, but fortunately my sister in law brought down a ham so we had that instead. The important thing is us and the memories we make. So friends, don’t kill yourselves in the kitchen over these next few weeks, just sit back, have a festive drink, and think about how happy your grandparents are to see you.

P1030396


Sunday Breakfast

I don’t know what your ideal Sunday looks like, but mine includes watching drinking coffee, watching Sunday Morning, a little knitting, reading the Sunday New York Times, and eating some sort of delicious treat. That’s where these doughnuts come in. I posted them in my Friday roundup, only to realize late Saturday night that I had no powdered sugar on hand. No bother! Instead I consulted this recipe and combined the two. Cinnamon has been a huge craving through this whole pregnancy, and waking up to the first nips of fall in the air demanded it’s spicy sweetness. The brown butter gives added depth and balances out the sugar coating. Besides, Joy and Tracy are great friends, and uniting their recipes is something cooking and baking is all about, sharing, adapting, and enjoying.  Even the Bear, aka pickiest eater ever, enjoyed a few bites.

P1020837

P1020839

The doughnuts are lightly sweet, but the real sweetness comes from the coating. Here are some instructions on how to brown butter. Don’t have buttermilk? Just combine 1/2C whole milk with 1 1/2T distilled white vinegar. Let it sit while you combine the other ingredients and it will be clabbered when it’s time to mix the wet stuff. I browned all the butter at once and divided it.  2T for the doughnuts, and 4T for the coating. You may want to round up to 7T to make sure you have exactly 6T in the end, but I found that to be unnecessary.

Baked Cinnamon Sugar Doughnuts with Brown Butter (adapted slightly from Joy the Baker and Shutterbean) makes 6

Doughnuts:

1C all purpose flour

3/4t baking powder

1/4t baking soda

1/2t salt

1/2t ground cinnamon

1/4t freshly grated nutmeg

1/3C sugar

1 lg egg

1/2C buttermilk

6T butter, browned and cooled, divided (see note above)

1t vanilla extract

Coating:

1/2C sugar

1t cinnamon

1) Preheat oven to 350 deg F. Lightly grease a 6 doughnut pan.

2) In a small pot brown all the butter and allow to cool slightly.

3) In a medium bowl, whisk together flour, baking powder, baking soda, salt, cinnamon, nutmeg, and sugar. Set aside.

4) Whisk together egg, buttermilk, vanilla, and 2T of the browned butter. Pour the wet ingredients into the dry and stir until just combined.

5) Fill the doughnut pan with the batter (I just use a regular spoon for this). You want the well to be about 3/4 full.

6) While the doughnuts bake, whisk together cinnamon and sugar in a small bowl.

7) Bake doughnuts for 10-12 min. Remove from oven and allow to cool in pan a few minutes before removing. Once out of the pan brush remainder of butter on doughnuts and coat with cinnamon sugar mixture.

8) Enjoy warm.

P1020845

Adventures in Jam

P1020791Last year I bought lots of berries at the farmers’ market and made a few different jams only to throw them all out when we moved. By throw out I mean pry solid masses of pureed sugary fruit from the jar, an act that was both frustrating and liberating. Washington had a very dry summer last year so the fruit lacked water, compounded with my lack of skill and experience I was doomed from the start it seemed. Kitchen failures, they happen to us all.  So while I was frustrated by the solid mass of fruit that could’ve substituted for industrial strength bonding agent, I was ok with saying goodbye to it and moving on. One of my goals this year was to become a more diverse canner. I wanted to move beyond jams and cucumber pickles and try out new recipes and methods.

So while I went on to make marmalades, fruit butters, salsas, fruit pickles, and double batches of cucumber pickles, I found myself still shying away from jams. After all, they are temperamental beasts, but also berries are stinking expensive around here, and farmers only seems to sell them in small quantities. But let’s remember, I want to be a more diverse canner, so berries might not be the direction I want to take this year. Instead, I was really excited to find some slightly bruised tomatoes for a steal last week and quickly snatched up 5 lbs. The tomato jam from Marisa McClellan’s book Food in Jars, has always sounded appealing to me. Sweet, savory, with a bit of heat, it sounded like something right up DB’s and my alley.

P1020786

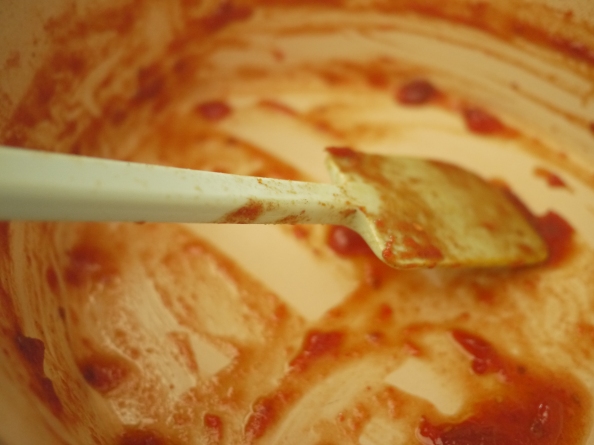
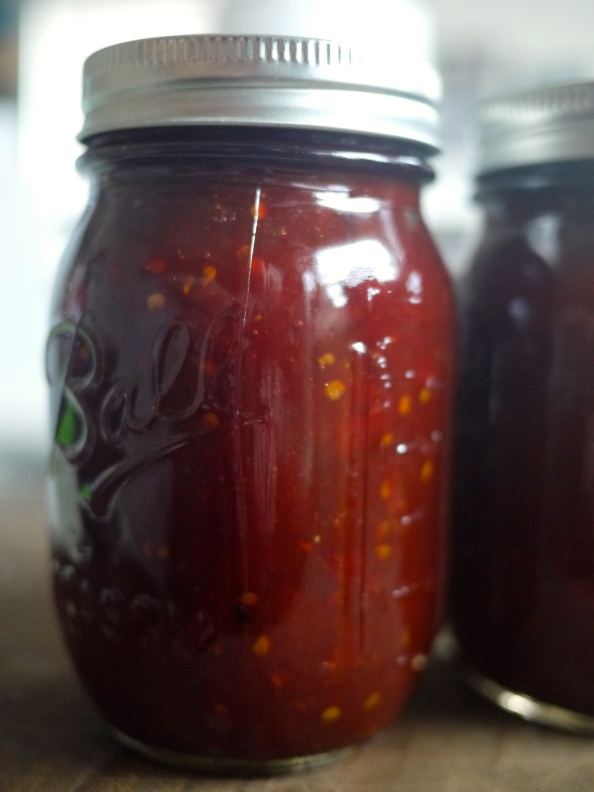
My tomatoes were extra watery, it actually took me about 4 hours to get them to cook down to a jam like consistency instead of the two recommended in the book. I also only got half the recipe’s yield, 2 pints instead of 4 (which is plenty for us). The important thing here was even when I could see that things were coming out exactly as written I was able to identify the issue and continue on. It took a while, but eventually the jam went from bright, summery red to a gorgeous dark burgundy. The ginger, cinnamon, and cloves made the house smell heavenly so I was kind of ok with the extra cooking time. Last year I probably would’ve hoped the jam would set in the jar, canned in too early, and had 4 jars of runny mess. I’m proud of my patience (even though it totally cut into nap time). After conquering this jam, I can confidently check off meeting my canning goal from the list this year. Over the next year I want to experiment more and start coming up with my own concoctions.

P1020789

Have you learned from any kitchen fails recently?

xo, S.
Kitchen Roundup

After being on the road for a few weeks, one of the best things about getting to our new house has been settling into our new kitchen. It has a lot more functional counterspace than our last place, the oven works properly, and there’s more storage (through I’m still figuring out the best way to lay everything out). Since becoming a more diverse canner is one of my goals this I’ve been busy visiting local farmers markets and trying all manner of new pickles, jams, and salsas. I also bought a new sourdough starter from King Arthur flour and have so far tried my hand at pretzels, waffles, and english muffins. Not everything has been a success (just now I burned some of the english muffins…oops), but after a month of not really cooking at all these past few weeks have been a welcome change of pace.

P1020645

Santa Rosa plums, red plums, and pluots getting ready to be jammed

Plums were on sale at the commissary so I also made plum muffins from the Smitten Kitchen Cookbook

Plums were on sale at the commissary so I also made plum muffins from the Smitten Kitchen Cookbook

DB started on some Creme de Menthe

DB started on some Creme de Menthe

Almond meal (leftover from making almond milk)

Almond meal (leftover from making almond milk)

Simple Green Smoothie

Like most gals these days, I’m a big fan of green smoothies. It’s kind of a no brainer, sometimes you need greens, sometimes you don’t want to eat all that salad. Smoothies are quicker…easier…you can add fruit! In fact, you can add a lot of things, too many things if you ask me. I think in our high stress, go go go world we get a little over-obsessed with turning our smoothies into these grandiose concoctions brimming with every antioxidant ever. I just think it gets too complicated.P1010791This smoothie is my default smoothie when I’m looking to get in some greens but don’t have a lot of time. It’s wholly uncomplicated. It’s hearty, but can be thrown together in a few minutes and doesn’t require any protein powder or other things you might not have on hand. Don’t have chia seeds? No worries, it’s perfectly good without them and I sometimes forget them myself.

P1010780

Simple Green Smoothie

1 frozen banana, chopped

2 big handfuls of greens (I used baby kale here, but often use spinach too)

1/4C Greek Yogurt

1/4C old fashioned rolled oats

1t chia seeds (optional)

1-2t honey

1/4-1/2C water (or liquid of your choice to thin it out)

Combine all ingredients in a blender and blend until fully incorporated. Pour into cup. Enjoy and feel good about yourself.

Banana Bread with Coconut and Pecans

P1010751Banana bread. Man, some people really go wild over the stuff, and for good reason. It’s a great way to use up some old bananas, you can adapt it to your tastes and since it has fruit and it’s called “bread” and not “cake”, you can tell yourself it’s healthy while you cut off an extra large piece do down with your coffee. One thing that has always bothered me though, those ripe bananas? We pretty much never have them. Bananas go fast around here. I have on more than one occassion found myself wanting to make a banana bread, only to find we are once again out. What to do? Roast the bananas of course! It’s an extra step that really takes the banana flavor to the next level. Plus, you can make it as soon as you bring your bananas home and cling to the desperate hope that they’ll be brown enough before they’re gobbled up.P1010745

I’ve been on a huge coconut kick lately. I used to hate the stuff, but I think that has to do with the unfortunate trend of adorning carrot cake with grated coconut for no good reason. I say no good reason because I never found it to enhance the cake, and as a kid, I always found the stuff scratchy on my throat which just ruined the whole experience. Fast forward a good 20+ years and I’ve come around to the stuff. I like in in things, where it can lend a hint of nuttiness and exotic aroma without overpowering the whole piece. Plus, it’s supposed to be one of those new hot foods that is super good for you. I’m no expert, but regardless of the potential health benefits, I can tell you that the addition to this banana bread gave it a subtle dimension of flavor that I’m really enjoying with my afternoon tea. P1010743

I saw this recipe over on the Shutterbean recently. Tracy uses olive oil as I have done here, but I think you could probably try it with coconut oil instead. Also, making this has highlighted the fact that my loaf pan (10″) is waaay to big and I should invest in an 8″-9″ one instead.P1010746

Banana Bread with Coconut and Pecans (adapted from Shutterbean)

3 medium bananas

3/4C all-purpose flour

1/2C whole wheat flour

1/4C flax seed meal

1/4C shredded coconut

1t baking powder

1t fine grain sea salt

1/2t ground cinnamon

1/2C olive oil

1/2C light brown sugar (lightly packed)

1/4C maple syrup

1 1/2t vanilla extract

2 large eggs

1/2C Greek yogurt

1/2C toasted pecans, chopped (optional)

To roast the bananas:

Preheat oven to 350 degrees.

1) Place bananas on rimmed baking sheet, and roast 20-25 minutes, until black

2) Set aside on cooling rack and allow to cool slightly

To make the bread:

Keep oven preheated at 350 degrees.

Butter an 8″ x 4″ loaf pan and place a piece of parchment inside, slightly hanging over the side so you can easily remove the bread.

1) In a medium bowl whisk together flours, flaxseed meal, coconut, salt, baking powder, and spices.

2) In a large bowl whisk together the olive oil and brown sugar until smooth. Add the maple syrup and vanilla, whisk to combine. Add the eggs one at a time, whisking to combine after each addition.

3) By now your bananas should be cool enough to handle (too hot and they’ll cook the eggs when combined). Remove the bananas from their skins and mash in a small bowl. Mix the bananas and yogurt with the rest of the dry ingredients.

4) Add the dry ingredients to the wet and stir with a wooden spoon or spatula until combined. Fold in the nuts if using. Batter will be slightly lumpy.

5) Spread batter evenly into prepared loaf pan and bake approximately 45-60 minutes, until a cake tester comes out clean. Allow to cool in pan and then remove using the parchment handles.

Kitchen Round-Up

It’s been a while since I spent any real time in the kitchen. Usually, there’s a mad cacophony of plates and pans, flours and sugars, herbs and spices, kitchen things and more kitchen things. But I took a break for a couple months, kept things super simple, ate a few store bought rotisserie chickens. It was a good break. It gave me time to acquire a few new cookbooks, go through quite a pile of magazines, and return to my kitchen inspired and ready to get back into the homemade.

Here’s how it went:

Maple meringues

Maple meringues made with left over egg whites from an ice cream fail

Hazelnut butter! Great on toast or in sandwiches with preserves.

Hazelnut butter! Great on toast or in sandwiches with preserves.

Cherry almond baked oatmeal. Delicious, but still tweaking the recipe for this one.

Cherry almond baked oatmeal. Delicious, but still tweaking the recipe for this one.


Life changing bread. I don't know that it's been life changing for me, but it was a good way to use up lots of nuts and seeds. It's filling and makes great toast as promised.

Life changing bread. I don’t know that it’s been life changing for me, but it was a good way to use up lots of nuts and seeds. It’s filling and makes great toast as promised.

Basil infused olive oil. I love having this on hand for homemade pizza and pesto.

Basil infused olive oil. I love having this on hand for homemade pizza and pesto.

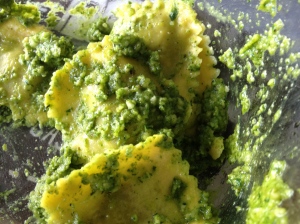
Oh look! Pesto! Spinach, almonds, pine nuts,  with the basil oil. The Bear even enjoyed a bit of this.

Oh look! Pesto! Spinach, almonds, pine nuts, with the basil oil. The Bear even enjoyed a bit of this.

Brown sugar pound cake. I can't speak for the final product just yet, but the batter tasted amazing. (batter is calorie free...right?)

Brown sugar pound cake. I can’t speak for the final product just yet, but the batter tasted amazing. (batter is calorie free…right?)


Cinnamon Maple Hazelnut Butter

P1010657Listen, before you say “Oh, you had hazelnuts? Why didn’t you make Nutella?!” I’d like to point out that hazelnuts aren’t just for making Nutella, they are far more versatile than that. In fact, yesterday I made both bread and this nut butter with them, and I don’t miss the chocolate at all. They’ve also become much easier to find. I bought these at Trader Joe’s. In the PNW they’re available in the fall, though I recommend you buy them already shelled.

If you haven’t tried it before, nut butter is super easy to make and endlessly adaptable to your tastes and dietary needs. Here I added cinnamon for a little spice and just a tablespoon of maple syrup for a hint of sweetness. I think it would be great with honey too, and maybe a pinch of nutmeg or ginger. Whatever you decide, make it up, slather it on your favorite toast or muffin and enjoy the fruits of your labor.P1010651

Cinnamon Maple Hazelnut Butter (adapted from My New Roots and Food in Jars)

Makes approx 2 cups

Note: If you decide to use more maple syrup you may want to dial back the amount of oil you use as it will effect the consistency)

2 1/2 C shelled hazelnuts

4T sunflower oil (or other neutral oil such as Safflower) + more as needed

1T maple syrup

3t cinnamon

Preheat oven to 275 degrees F

1) Spread hazelnuts evenly on a rimmed baking sheet and roast for about 20 minutes. Nuts should be fragrant and golden. Allow to cool for a few minutes then rub with a kitchen towel to help loosen skins

2) Remove as much of the skin as you can and put nuts in bowl of food processor. Grind until nuts are coarse crumbs (approx 3 minutes)

3) With processor on, add oil 1 T at a time until butter reaches desired consistency (it should be spreadable, but not too greasy. For me it was 4T +1t)

4) Add maple syrup and cinnamon, process until fully incorporated

5) Transfer to jar and store in fridge

P1010652